Showing posts with label Crafts. Show all posts

Project {Coffee Filter Butterflies}

According to the Farmer's Almanac, May 15th is the final frost date around here.  This can only mean one thing: the Gnomes and Fairies are ready to make their arrival in our gardens for the summer!  Little Miss C has been very curious about when the Fairies are going to move in. We go down to the garden everyday and see if any have come to live in the little homes. So far, we have just attracted a small Lookout Gnome.  A few weeks ago,  she looked at me and said, "mama, we have paw-tee, and fay-wees come."  What can I say, she's my kid.

And, yes, I am that crazy mother that decided to have a "Fairy Garden Housewarming Party!" 

The Gnome Workshop has been in full swing lately; over the next couple of weeks I'll give you all the details on how to create a simple (and affordable) Fairy Garden for even the smallest of spaces.  This weekend, we started making some decorations for the party.  Chuck has been full blown obsessed with all things winged lately, so I thought we'd try her little hands out at coffee filter butterflies. 

We set up a table on the porch  with water color paint, brushes, and dot-a-dot painters, gave the girls some coffee filters, and watched the magic happen. 
Chuck and her little friend spent the better part of an hour watching the colors whirl about on the coffee filter.  Watching them experiment with different color combinations was quite fun.  They quickly figured out that a dot-a-dot painter and a wet coffee filter create beautiful swirls of color.  We hung our Technicolor creations up to dry for a bit. 

When the filters were dry to the touch, we folded them accordian style, and clipped the middle with a clothespin to create a "bew-ti-ful" butterfly. 

With a little luck, these winged creations will attract a fairy (or two!)


Creative Spaces {Welcome to Chuck's World}


We moved into our home when I was six months pregnant with Chuck.  Our home is "an adorable hundred and six year old cottage"(at least that's how the realtor described it).  I instantly developed an intense crush on the house; I imagined my soon-to-be daughter experiencing so many of her firsts in this home. 

A hundred years ago, there was no such thing as a "family room", a "living room" and a "play room".  The ground floor of my home consists of 3 main spaces: the main room, the dining room, and the kitchen.  I'm an "organizer"; I attempt to keep my sanity by having "a place for everything and everything in its place". I am happiest in my home when the beds are made, the laundry is folded, and the clutter is all as it should be (by that, I mean pushed and piled into its appropriate corners and areas of the house).  

For the past two years, I have attempted to maintain a harmonious relationship between Chuck's stuff and Mom/Dad's stuff; however, there is no mistaking that a toddler lives in my home. There is a play kitchen in my kitchen, toys where books should be on shelves, a teepee on my front porch, and a booster seat firmly attached to the head of the dining room table.  There was also an unorganized mountain of arts and crafts materials stored under my kitchen counter.  Not only was it "taking over" my kitchen, but Chuck couldn't safely or freely get to any of it.

A couple of weeks ago, she stood by the gate at the kitchen entrance asking for "Pay-nt, Mama.  Pay-nt".  While I was elbow deep in dinner preparations, I had a one of those mommy a-ha moments: 1) My daughter wanted to paint, 2) My daughter wasn't asking to paint with me, 3) My daughter could be painting happily while I was making dinner.  

As you've probably picked up, I don't have much space, so I had to be very thrifty with the amount of square footage this endeavor was going to take up. We bought Chuck a little table a while ago, but until this moment it pretty much acted as an end table in my main room.  Sure, Chuck sat at the table and colored, but I also put my coffee on it in the morning.  If I wanted Chuck to play and be creative, I needed to give her a creative space. I also had to think about what materials I wanted to let Chuck have free reign over.

One day during nap, I decided to tackle this project. For my own sanity, I needed to maintain that balance between Chuck-land, and Mom/Dad-land.  In other words, I didn't want my living room looking like my class room. I started simple; I moved her table away from the sofa and gave her a space of her own. So, this is Chuck's Creative Space.  It's pretty simple, but I'm pretty happy with how it turned out.

Small Creative Bins:
I bought some Kraft Paper bins from the Dollar Spot at Target.  I didn't know what I wanted them to be, then I remembered that I had some chalk board paint, so I decided to label them.  Using the chalk board paint also allows me to change the label any time.  Right now they are filled with crayons and Do-A-Dot Paint Markers.  I also labeled some mason jars and filled them with small art materials such as plastic gems, pom poms, pipe cleaners, and stickers.


Large Creative Bin:
I've been saving these fruit crates for years for no apparent reason, until I realized that they made great art crates.  I filled the large bin with paper, paper scraps, recyclables, doughs, etc.  Basically, anything that is to big for the small bins goes in the big bins. 

Art Work:
In order to define Chuck's space as her own, I decided to give her some art work to look at while she's at work.  I found some pictures of her favorite books, framed them, and hung them on the wall with Command Strips (this way, if we decide to move her space, I won't have to fill in any holes).  I placed these on the walls while she was sleeping.  The next morning, she immediate noticed her beloved "Via" (Olivia) "Mad-a-lye-in" (Madeline), and "Choo-choo" (The Little Engine That Could).  Yes, she tried to pull them off the wall, but I am happy to say they are still firmly in place! 

Chuck happily explores her Creative Space independently.  My favorite is when she notices that I've placed new things in her large bin.  She is usually very good at keeping the art materials away from the furniture.  Last week she told me she wanted to "Pay-nt like Via", and I caught her trying to use her Do-A-Dots on the wall.  I'm not going to lie, it took all my motherly instincts not to laugh out loud at my creative little lady.  


{Upcycled Play Kitchen}


I spent the summer watching Chuck play in the kitchen area of our local Children's Museum.  We went weekly in the morning for "member hours", so the place was basically empty giving her free reign of the kitchen.  She loved opening and closing (and opening and closing, and opening and closing) the oven door.  She loved putting things into the refrigerator.  She loved turning knobs, and pretending she was doing something.  Somewhere around August, I decided I would get her a play kitchen for her Christmas this year.

I did a little bit of searching to see what I could find/afford in the vast world of play kitchens. This play kitchen was - more than likely- going to be front and center in my living room.  What I could afford, I hated (sorry pink plastic play kitchen).  And, what I loved, I couldn't afford.  One sleepless night, I was clicking around on Pinterest and I discovered the bold new world of DIY Nightstand Kitchens. 

This was perfect!   I could do this! I went to Salvation Army, found a nightstand, and drew a diagram of how this magical transformation was going to take place.  It was August, so I had four months to make this happen!

And, I did.

I use the term "I" here loosely.  Really, my '"team"* helped me pull this whole thing together in the week leading up to Christmas. And, by the week leading up to Christmas, I really mean Christmas Eve. Secret crafting with power tools is hard to pull off during nap time.  Stenciling at ten o'clock at night is not something I would recommend.  The good news is Chuck absolutely loves it!  She doesn't see the imperfect cuts or the paint smudges.  And that's why I love her.


Here's How I Did It . . .  
1. Find an old nightstand or two
2. Remove all hardware, and sand it down
3. Paint and prime

Here's the fun part!  You can get creative with how you want your kitchen to look.  I scoured Pinterest and blogs for some inspiration.


I painted some wooden circles black  and glued them onto the top of the nightstand for burners.

What REALLY brought this project to life was this awesome set of stencils I purchased at Michaels from Handmade Charlotte and the little details.  I purchased some kitchen utensils to keep in the drawer, and some towels to place on the hooks.  Chuck's aunt gave her a set of awesome pots and pans for her birthday. I have been working on some felted pasta for her for a while.  I absolutely love watching her stir her little felted pasta in her pot!
This is still a work in progress; I hope to one day add an oven door and some knobs for the burners. Maybe one day, we'll even add another nightstand and make a sink.

The other day, I watched Chuck look at the stencils on the back splash  and say "apple, birthday (aka cupcake) kettle, apple", and it made me feel a fuzziness I can only imagine as pride.


*Team Shout-Out

Thank you Tracey for knowing how to paint things.  Even when the paint that I have applied that was supposed to go over EVERYTHING decided to bubble and peel off in giant strips of latexy goo.

Thank you John for all the times you said you were going to come over and help Brian.  I don't know if you really helped, but I thank you for giving me a reason to order pizza. 


Thank you Brian.  Thank you for putting up with my crazy ideas.  Thank you for being Chuck's reluctant Elf this year.  Thank you for constantly reminding me that "this is your idea, why am I doing all the work?"  Thank you for making my little drawing on a scrap of paper come to life.


Thank you mom for telling me the story of the thing your dad made for you that you still remember today (even though, I clearly do not remember what that thing was).  You may not realize this, but your story was just what I needed to re-motivate me to finish Chuck's kitchen.

{Happy Noon Years!}


As a mom of a toddler that doesn’t sleep, the thought of staying up until midnight to ring in the new year sounds like torture. Yet, for fear of being lame I had to do something, thus Noon Years Eve was born.

Now that Lucas and Chuck are old enough to enjoy their mom’s crazy ideas, we decided to put together a little party for them. It ended up being a really small party (thank you flu season!) but it ended up being the perfect size for them. The kids all had a great time, and that’s really all that matters.

The anatomy of a Noon Years Eve party doesn’t really take much. There were a few simple activities planned, a few decorations, some simple yet amazing food and we partied on!

The Decor
I bought a $3.99 roll of black glittery wrapping paper from the craft store, cut out a “Happy Noon Year” sign and used the excess as the backdrop to a big “2014” cut out of kraft paper. Note to moms: Extra Strength glue sticks do not stick to glitter wrapping paper so make sure you use wet glue or a glue gun before you tape the wrapping paper to the wall. Lesson learned.

Luckily, Ally has an unending supply of Kraft paper which I papered a section of the wall and floor for the kids to decorate with dot art, chalk and stickers. It wasn’t a big hit, it provided about 10 minutes of fun but made for a cute backdrop.

The NYE Bling
Thank you Walmart for selling cheesy paper 2014 glasses, 3 for $2.44. How could I resist?

We also have an unending supply of mardi gras beads that they loved putting on! At one point I think Chuck was wearing them all, she even managed to get them around her waist and legs-it was adorable!
The Crafts
What would NYE be without party hats and noisemakers? The kids werent interested in decorating the paper crowns I had cut out, but they loved the noisemakers and they were so simple to make! I cut up some mardi gras beads into short strands and Lucas and Chuck had a great time putting them into tennis ball tubes. The wide mouths of the tubes were the perfect size for little hands to put in (and take out) the colorful beads. I had also bought some sparkle star stickers to decorate the outside, but you really didn’t need them, the beads were so pretty by themselves. Some stars ended up inside the tubes as well and it made for a great effect!

Tasty Treats
Delicious food is a must for any NYE party and just because we were partying at noon didn’t hold us back! I wanted to do something simple, yet amazingly delicious so we had a mac and cheese bar! It was perfect for the kids and adults and as the hostess I loved it because it didn’t take me away from the party. Before the party I put together mac and cheese in the crock pot and prepped all the toppings. Since it was a small party, we only had 4 toppings but the possibilities are endless! Our choices were: chicken, bacon, peas and gouda (for those sophisticated palates). To make it fun, and easy to identify the toppings, I borrowed the chalkboard from Lucas’s room to use as a serving board to easily label each bowl. Unfortunately I did not get a pic of everything all set up- we were all very hungry! For desert, everyone got a midnight kiss!


The Big Countdown!
Supplies needed: plastic drop cloth, painters tape, balloons, balloons, balloons!
For the countdown to noon, I wanted to make it big and exciting with minimal mess. A balloon drop was perfect! For the countdown I made a quick slideshow on iPhoto. Luckily iPhoto makes everything simple, even computer challenged people like myself can figure it out (for clarification, I am Karen. Ally rocks at computers). 

After the countdown we pulled the painters tape off the ceiling and the kids ran around with the balloons for at least 20 minutes. They had the best time! Of course, after his friends left Lucas asked to “put them back up there?” It didn't happen, but the balloons kept him occupied for that evening and part of New years day!


We all had a great time and I am hoping to make this part of our New Years Eve tradition for years to come!


{Five Days of Dough}


Around this time last year, I texted Karen an adorable toddler handprint painted to look like Santa: "We're totally doing this with the kids." I invited her over a couple of weeks before Christmas, we made a batch of salt dough, I forced my daughter's clenched fists open, and pressed her tiny fingers into the mush. 

Twelve months later, I'm standing in a sea of salt (toddler measuring and pouring is a messy task), and we're pressing little hands and feet into doughy goodness.  

What is it about dough? What makes it so magical for toddlers to explore? 

First of all, as it's name would suggest, the main point of play dough is "play". Most of the time when we hand Lucas and Chuck a ball of dough, we have nothing planned other than mushing around dough. All the motions-the smoothing, the rolling, the patting, the building- are a workout for little hands. This is an important part of developing fine motor skills. 

The textural experience of different kinds of dough also encourages sensory exploration. Chuck wasn't so sure she liked dough the first time she touched it. It took her a little while to get used to. Her little hands had to get used to the way it felt. Lucas dove right in, making foot prints with an emphatic "ta da!"
This is how we came up with LuCk's Five Days of Dough!  It's an integral part of our kid's sensory diet! 

{Day 1}

This smooth white dough is perfect for ornament making! You can roll it out and make hand prints, use cookie cutters to create shapes!  The best part about this dough is it's color.  Thanks to the 2 Cups of baking soda it is almost pure white!
1 1/2 Cups of Water
2 Cups Baking Soda
1 Cup Cornstarch
In a pot, combine all the ingredients and stir over a medium heat.  When the mixture starts to look like mashed potatoes, remove from the heat, and let it cool down. 
Bake in a 175 degree oven until hard to the touch 


{Day 2} 

This dough is a classic! You almost always have all the right ingredients in your house to make it!  It sturdy enough to last a couple of days (or weeks . . . ) in an airtight container. 
If you decide you want to preserve your child's creations, simply air dry, or bake in a 200 deg F oven until hard 
Recipe: 
In a bowl, mix the following ingredients
1 Cup Salt
1 Cup Flour
1/2 Cup Water
Stir until smooth

Day 3 
{Elf Dough} 
 (aka Peppermint Sparkle Play Dough)
This is the classic LuCk Dough mixed with some peppermint oil and glitter. 
We rolled it up in a ball, put it in a ziplock bag, and gave it to our friends at daycare!   

{Day 4}
Shapes and Sizes

Sometimes it doesn't really matter what kind of dough you use, its what you make out of it!  We like to "capture the moment" in dough with hand prints, foot prints, and any other kind of print you can think of. 
Chuck likes to build snowmen and makes her dollies cakes. Let their imaginations soar!  Dough can be anything! 

{Day 5} 
Tools Of The Trade

The kids are like Macgyver when it comes to finding things to mush into dough.  Cookie cutters, trucks, spatulas - go search around your house to find things to create interesting patterns in your dough! 

Watching the kids help us mix up the salt dough this year was a real treat!  It's a fun way to mark how far their little minds have come in these last 12 months. 


{Project: Glitter Pinecones}


I have always had a creative side and have waited many years to decorate my house with homemade goodies made by tiny hands. 

 Let's face it, most kids crafts are cheesy, made with tissue paper or toilet paper rolls and although you love it because your kid made it, it's just not beautiful to look at. 

Problem: how am I going to make a simple, beautiful Christmas craft with my toddler? 

Solution: when in doubt, look to nature. Everything out there is unique and beautiful in its own right. Lucas is a big fan of exploring the great outdoors. He loves to listen to the birds, dig in the dirt and collect "treasures". One day, we were on the playground and Lucas began collecting pinecones! There are so many things to do with pinecones, but to make it toddler simple I decided to go with glue and glitter! Now this may sound like a disaster waiting to happen, but with a few of the right tools this project can be done with minimum mess. The trick is to keep everything contained. 

We contained the glue in an old frosting container and the glitter in tennis ball tubes. You can use anything as long as the top is as wide as your largest pinecone and it is recommended your glitter containers have tops. 

I was a little hesitant about doing this project with Lucas. Have you ever tried to use glitter with a toddler while taking pictures? I gave it a test run the night before, just to make sure everything was ready (and to snap a few pics incase it was glitter disaster the next day). As soon as Lucas was down the stairs the next morning he was interested what I had left on the counter. In all honesty, it went even better than I imagined! I had two containers of glitter ready to go to keep things moving along but much to my surprise Lucas loved dipping the pinecones in the glue and watching the glue drip off! He made 10 pinecones all by himself. He loved shaking the tubes and was thrilled as each pinecone came out even more beautiful than the last. We were going to make a few to decorate our house (I was hoping for 4 or 5) but now it looks like we will have enough for a few gifts too! If you are LuCky enough to be gifted a handmade ornament don't forget to act surprised! 


The finished products are beautiful, no matter how much glitter ends up on them! For those older LuCk followers, you can always paint the glue on with a paintbrush, use different colors etc. Another fun idea is pom poms! Leave the pine cones as is, or paint them green to look like mini Christmas trees with ormaments on them!


{Project: You've Been Elfed!}


As a lover of food, mason jars and all things crafty, I have always wanted to gift mason jar cookies to all of my friends. You know the ones:  the layers of flour, sugar and chocolate chips just waiting for a few wet ingredients to be made into baking bliss.  For whatever reason, I have never gotten around to it. Maybe it's an irrational fear of those little jars of yumminess not being as loved by someone else. 

Another thing I have always wanted to do was to "Boo!" Someone. Basically, it's like ding, dong, dash with a treat. Technically, it's a Halloween thing but who says you can't be Elfed or Snowmanned? 

As Lucas and I were whipping up another batch of play dough I realized I could do both of these fun activities and thus, LuCk Dough Jars were born!


Lucas helped pack all of the dry ingredients into mason jars, I popped on a label and attached a festive cookie cutter and we were ready to go!

For extra fun, I decided to add a film canister with peppermint extract in it. If you are using a dry scent, like cinnamon you can always use a little baggy. Just make sure you let the receiver know there is a little something extra that needs to be taken out and added before cooking!

Unfortunately, we will have to save the Boo! Portion of my great idea until next year when he understands the concept a bit more but that's okay! 

It is also a good idea to give your mom friends the heads up before coming over and leaving packages on the stoop. I also made sure each envelope said it was from Lucas.


{Make n' Mingle}


Celebrating Christmas is something relatively new to me. It's not like I had evil parents, it's just I'm Jewish, and my husband isn't. What this means is I've basically idealized Christmas for most of my life. Growing up, my family's tradition was to either go on vacation, or go to the movies. Don't misunderstand me, I'm not complaining about a lack of Christmas in my childhood.  Believe me, I had a rather remarkable childhood.  Yet, to an outsider, the whole Christmas thing is kind of magical: families bundling together around a fireplace, opening up gifts wrapped with care and love that were delivered by a jolly old man.  In my dreams, Christmas was a simply wonderful day. 

The Holiday Season is a busy time with my family: we have five birthdays, Christmas, and Hanukkah.   With so much to celebrate, it can all get a bit overwhelming! In the month of December alone, Chuck celebrates Hanukkah, Christmas, and her second birthday.   

As I grow older (and slightly more cynical), you begin to realize the commercialism associated with Christmas.  

There has always been something a wee bit wondrous about a handmade, homemade holiday. I tend to go into craft overload this time of year. Based on my Pinterest feed, I don't think I'm the only one!  I always find myself pinning all kinds of things that would be fun to make 'some day'.  Last year,  in order to combat a bit of the commercialism, I decided to make that "some day" happen. I invited a bunch of my ladies over to the house for a little Make n' Mingle.  The premise is pretty simple: you bring your craft supplies, some adult libations, and some treats.  We sit around my dining room table  craft, talk, and help each other out.  

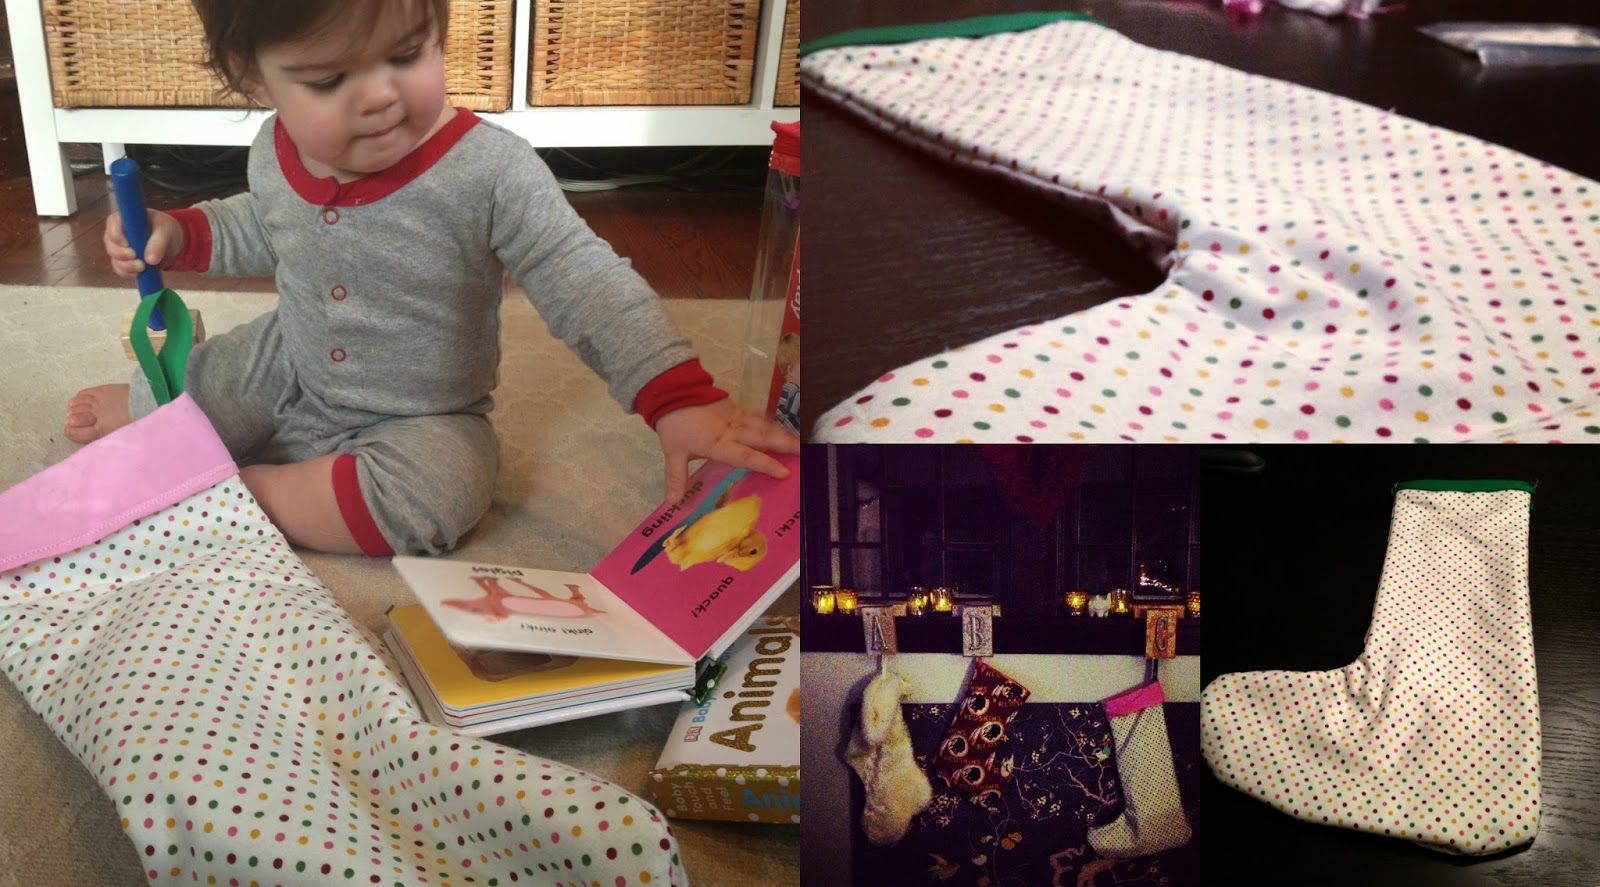
Alone, I can't sew my way out of a paper bag.  Yet, as a group, we managed to sew my daughter's Christmas Stocking last year.  I was so proud of this stocking, that I may or may not have created a Facebook post entitled  "This is how proud of I am of my stocking" and another update that states "bite me Pottery Barn Christmas, my daughter's stocking is made with love." I pulled it out of the box this year, and was amazed that it was still in one piece!  I hope she uses it for a long long time.  And, although its not as fancy as a Pottery Barn Stocking, I hope she appreciates all the thought and planning that went into it. 


This month, I would like to focus on handmade, homemade holidays.  Will my daughter receive a toy that came from a store?  Of course!  But, I would like to create something for her that came from me every year. 

The point of Make n' Mingle is not so much what we make, its how we make it.  We make it together, with friends, sitting around a table, sharing ideas, telling stories, enjoying a cocktail (or a beer if you're Karen).  It's a lot like an adult playdate! 

Want to see where we get our ideas?  Follow our Make n' Mingle Pinterest Board!  Follow Allyson Noel Make and Mingle! on Pinterest<>