In a few short days, my daughter will embark on her journey to pre-school. As a mom, this is definitely a bitter-sweet moment for me. Yes, she's been going to daycare since she was 8 weeks-old, but I was always fortunate enough to have daycare at my school. So, C was never more than 500ft from me. This year, I'm dropping her off at a strange and foreign place with people that I don't know beyond their highlighted names on her class list. And, I would be completely lying if I told you that this didn't terrify me. Completely. Utterly. To. My. Very. Core.
There are very few moments in life that completely define themselves, and I am staring one of them in the eye: in a few short days, my daughter will be a pre-schooler. There's no going back. First she goes to pre-school, next thing you know we're fighting with each other in a Bed Bath & Beyond over which shower caddy she should purchase for college. I saw this moment coming. It's been hanging over me like a little cloud all summer. We've talked about all the fun things she'll do at her new school. We've even read some books about going to school. So, C is pretty excited about going to pre-school. I, on the other hand, have my reservations and feel like I am sitting on the precipice of a nervous breakdown/ early-onset midlife crisis.
I am going to summon every morsel of courage, put on my game face, and pretend that I am absolutely thrilled that she is going to be spending the majority of her day out of my line-of-sight. Out of my arms. Out of my control. I am determined that she will not see me cry. Like every other mother, I will hold it in as best I can until I am in the car, and then, only then, will I openly weep like a baby.
Soon to be hysterics aside, I am as well prepared for this event as one can be because my daughter has taught me to be brave. As a "girl mom", much emphasis has been placed on "raising a strong daughter." It took me this summer to realize, that C has been raising a strong mom.
Just by coming into this world, C kicked one of my biggest fears: Childbirth. I remember that moment I learned how babies get out of you. I also remember my Early Childhood Development class in high school, and the graphic video that accompanied it. This was the best form of birth control ever.
So I got to thinking of the gauntlet of "bravery challenges" my daughter presented me with this summer . Each one of these items is something my daughter is never allowed to know I am terrified of. Instead, I have been putting on my best game face, smiling, and pretending to be very excited at each of these challenges. Here they are, in no order of preference:
Bugs. I am not a fan of bugs. They are creepy. They are crawly. They bite. They sting. Let's not even get me started on how I feel about bees.
Then there was the moment when C picked up one of those bugs with the millions of legs out of the bath drain, and emphatically said, "Look Mama, buggy!" and demanded that we go set him free.
You try telling your sweet, innocent toddler that not only are bugs gross, but she completely squished the life out of that thing when she pressed him between her chubby little fingers.
No, you suppress the urge to shriek, and decide this is not the moment to explain the concept of "Wow. That's dead." to her. So, you pull her out of the tub, walk her to the back door, and set the creepy-crawly "free".
Thunderstorms. Each and every time there was a thunderstorm this summer, C would ask if she could go outside to see the "lights".
For me, it's like I have the National Weather Service Ticker, Panic Edition running through my head: "If you can hear thunder, you are close enough to get struck by lightning", "If you can hear thunder, you are in danger", and, of course "Lightning is one of nature's biggest killers."
We have reached a nice compromise with this one: we safely watch the storms from our screened-in front porch. I do my best yoga-breathing and pretend that I'm not terrified that lightening is going to send that giant old oak tree crashing onto our front porch, and C pulls her little chair up to the window and watches the "light show."
Open Water. I have a very love/hate relationship with the ocean. I love it when I can safely place my feet on the bottom, clearly see my toes, and only be surrounded by non-threatening aquatic animals. I hate it when I am surrounded by seaweed and potentially threatening ocean life. Basically, I love pools. Especially those lovely pools at hotels in Aruba with swim-up bars and infinity edges that make you feel like you are in the ocean.
C has a very love/love relationship with the sea. She, quite literally, dives right in, and pulls clumps of whatever is lining the ocean floor up to the surface and energetically presents it to me with the amount of enthusiasm that only a toddler can exude. She pulls me into the water a little bit deeper each time. A little bit out of my comfort zone, and a world away from Aruba.
This morning, as I was standing knee deep in the murkiest of waters, I looked down at my baby girl, held her by her hands, and swung her toes through the water. She giggled with delight, just as I know she will when I drop her off on Tuesday morning. I know that next summer, she will be ready to walk a little bit deeper into these waters (maybe even put her face in, and blow a few bubbles), and I will be ready to follow my Brave Girl into her Big Brave World.
Grown-Up Play Dates
Music Together {Part 1: Hello Everybody}
We all know that music is a very important part of brain development. I could go on about how music has a huge impact on the developing brain, and synapses, and cognition, and blah, blah, blah. But, at the end of the day, the main idea is that music is good for you; it's good for your brain, it's good for your soul, it's good for your body.
With that said, one of the major areas of development I feel like I am slacking in is exposing Lucas to music. Don't get me wrong, we listen to the radio in the car, we sing some silly songs at home,and he had some music in pre-school. But, in his three years of life, he has never begged to go to an actual music class. That is, until we tried Music Together!
We have tried musical experiences at several local libraries, at the children's museum, at children's concerts, at festivals, and birthday parties. But he always was one to run around and not pay attention to it. So instead of continually exposing him to music, I kind of gave up and focused on his other interests. Yes, my inner teacher knows that you are meant to broaden your child's horizons, nevertheless, it's what happened.
So when the opportunity came up to visit Music Together I decided to go for it. Ally had been taking Chuck for about a year, and raved about the program. She'd say things like, "I don't know how they do it, but Chuck actually puts the toys away when they sing a magical clean-up song", and "Chuck just loves Music Together!" Now that Lucas is a little bit older, I thought it was time to give music another chance!
I was overjoyed that from the very first song, he just sat down and started singing. It was amazing. I never knew he had this in him!
Yes, from the very. first. song.
I don't know how they do it. The room is a little chaotic. Some of the moms know each other, some have taken a class before, some (like myself) knew no one. The second the teacher started singing Hello Everybody, my son was entranced. If they were serving Kool-Aid, he definitely drank every last drop. And he loved it, and wanted more.
With that said, one of the major areas of development I feel like I am slacking in is exposing Lucas to music. Don't get me wrong, we listen to the radio in the car, we sing some silly songs at home,and he had some music in pre-school. But, in his three years of life, he has never begged to go to an actual music class. That is, until we tried Music Together!
We have tried musical experiences at several local libraries, at the children's museum, at children's concerts, at festivals, and birthday parties. But he always was one to run around and not pay attention to it. So instead of continually exposing him to music, I kind of gave up and focused on his other interests. Yes, my inner teacher knows that you are meant to broaden your child's horizons, nevertheless, it's what happened.
So when the opportunity came up to visit Music Together I decided to go for it. Ally had been taking Chuck for about a year, and raved about the program. She'd say things like, "I don't know how they do it, but Chuck actually puts the toys away when they sing a magical clean-up song", and "Chuck just loves Music Together!" Now that Lucas is a little bit older, I thought it was time to give music another chance!
I was overjoyed that from the very first song, he just sat down and started singing. It was amazing. I never knew he had this in him!
Yes, from the very. first. song.
I don't know how they do it. The room is a little chaotic. Some of the moms know each other, some have taken a class before, some (like myself) knew no one. The second the teacher started singing Hello Everybody, my son was entranced. If they were serving Kool-Aid, he definitely drank every last drop. And he loved it, and wanted more.
Project {Patriotic Potatoes}
Chuck and I decided to decorate our wagon for the local "Push & Pull Parade" on the Fourth of July. The premise is pretty simple: decorate a non-motorized vehicle (bikes, wagons, trikes, scooters, strollers) in red white and blue, and parade through town. I thought it sounded like a fun way to celebrate the holiday.
Chuck is two-and-a-half, so I knew I needed a stamp with a sturdy handle. I went to Michael's to pick up a couple of things to decorate, but had a really hard time finding toddler stamps. With a little bit a tinkering, I turned a potato into a perfect Chuck sized stamp! We stamped a simple round coffee filter with our stars and made a super simple star fan bunting to decorate our wagon. You could also use this bunting to decorate a BBQ table, a fence, or any place else that needs a touch of red, white and blue!
Have a Happy Fourth of July!
Materials:
Star-Shaped Cookie Cutter
Potato (wide enough to cover the cookie cutter)
Round Coffee Filters
Chuck is two-and-a-half, so I knew I needed a stamp with a sturdy handle. I went to Michael's to pick up a couple of things to decorate, but had a really hard time finding toddler stamps. With a little bit a tinkering, I turned a potato into a perfect Chuck sized stamp! We stamped a simple round coffee filter with our stars and made a super simple star fan bunting to decorate our wagon. You could also use this bunting to decorate a BBQ table, a fence, or any place else that needs a touch of red, white and blue!
Have a Happy Fourth of July!
Materials:
Star-Shaped Cookie Cutter
Potato (wide enough to cover the cookie cutter)
Round Coffee Filters
Sharp Knife
Red & Blue Paint
Directions: Cut your potato in half, preferably at the widest part. Insert your star cookie cutter into the potato. While the cookie cutter is still in the potato, take your knife and cut around the outside of the potato, leaving only the star shape intact.
Remove the cookie cutter
Stamp away!
Red & Blue Paint
Directions: Cut your potato in half, preferably at the widest part. Insert your star cookie cutter into the potato. While the cookie cutter is still in the potato, take your knife and cut around the outside of the potato, leaving only the star shape intact.
Remove the cookie cutter
Stamp away!
LuCk Date {Bubbles}
We rang in the official start of summer with a POP!
There was nothing at this Bubble LuCk Date that you couldn't do at home! Building a basic bubble tool kit is a great way to keep the kids entertained for a while on a summer day.
There are so many bubble activities to entertain kids of all ages! For this LuCk Date, we had several bubble stations set up with various materials to explore. We filled some shallow tubs with bubble solution and allowed the kids to explore blowing bubbles with fly swatters, string, straws, paper tubes, and bubble wands. A plastic drink dispenser made a great "bubble refill" station! The kids loved filling cups with soapy solution for more bubble play!
For a craft, we set up a DIY Wand Table. A simple pipe cleaner and beads can be transformed into a bubble wand by forming one of of the pipe cleaner into a simple shape (oval, circle, heart, square), and threading beads on the pipe cleaner to create a "handle."
We filled a small kiddie pool with bubbles, placed a hula hoop inside, and tried to make a giant bubble. I had a few too many little hands helping me , but we had a great time trying to make the big bubble fly!
Thank you everyone for "popping in" to this LuCk Date! Have a fantastic summer!
Recipe {Strawberry Yogurt Ice Pops}
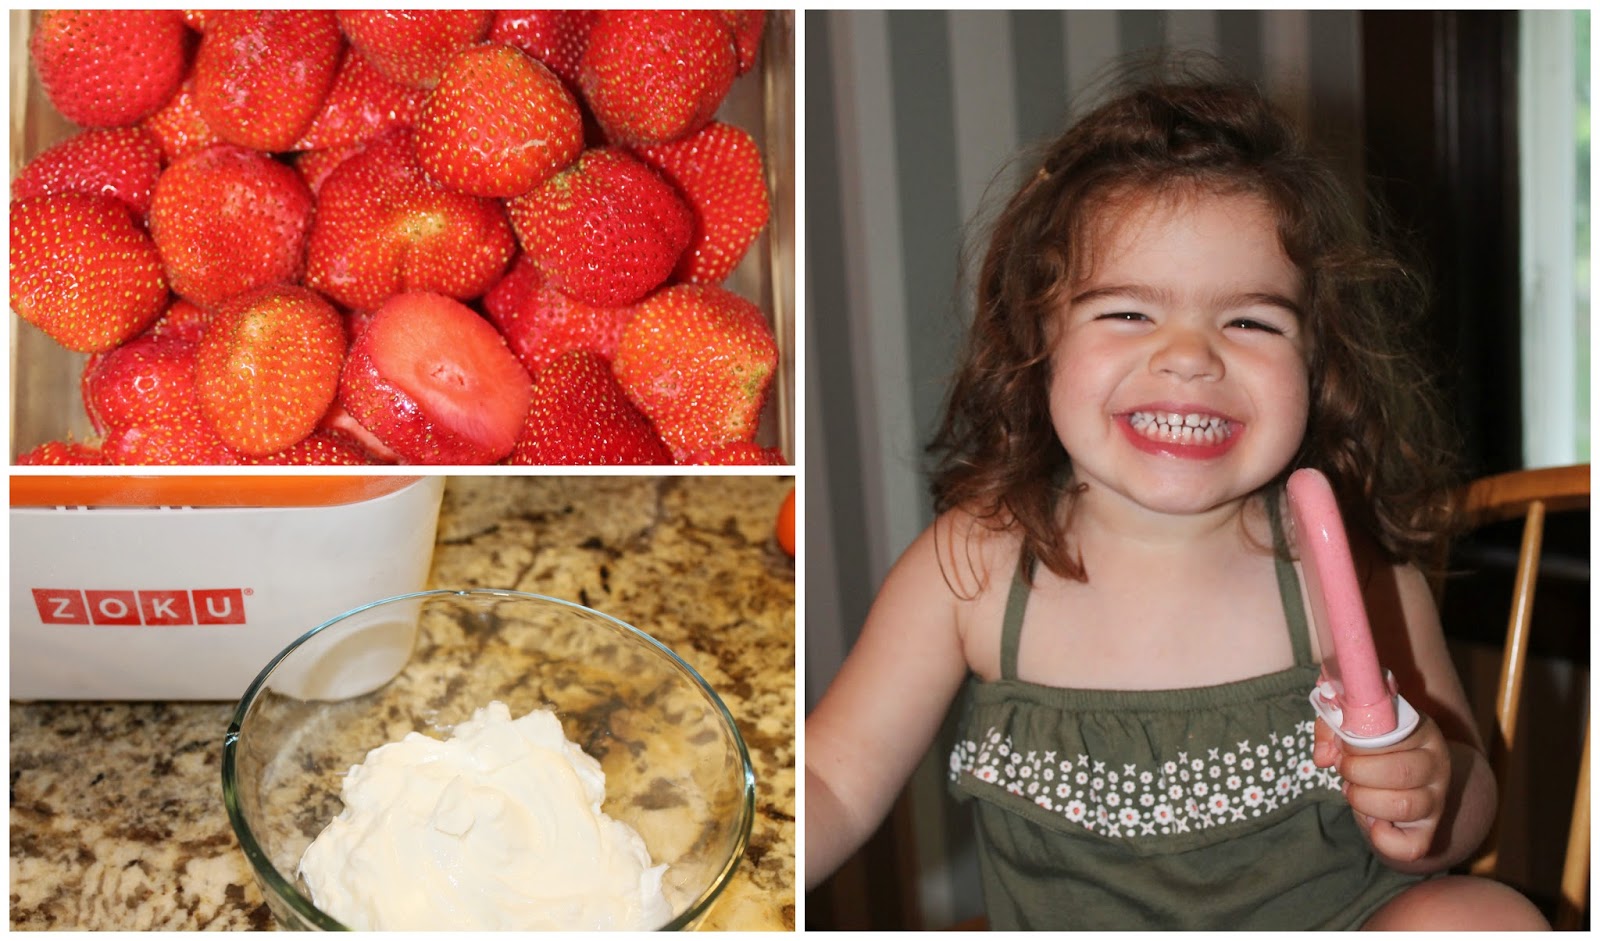
Lucas and Chuck picked their weight in strawberries this weekend! Karen and I challenged ourselves with a little "what can we make out of all these strawberries before they go bad?"
A good friend gave Chuck a Zoku Pop Maker for her first birthday, so I decided it was about time to open this box and get poppin! Since the was my first time using the Zoku, I decided to keep things simple.
Recipe:
3 parts strawberry
1 part yogurt (we used Greek)
1 part milk (we used 2%)
1 part honey
Place all the ingredients in a blender or food processor, and mix until smooth. If you are using a Zoku Pop Maker, these take about 7 minutes. I think that was the only learning curve for the Zoku; cream based pops take longer to solidify than water based ones.
Chuck absolutely loved her yogurt pops! Can't wait to see what else we come up with!
Celebrate {Father's Day}
Our dads don't need tie clips or golf bags, so what is something that we can make for them that they will actually use?
If you are anything like me, you have a ton of absolutely adorable Instagrams that live somewhere in the clouds. I love me some Instagrams, but their signature square shape make them a bit challenging to put into a standard size picture frame.
I made my husband this set of awesome coasters out of some of our favorite 'grams!
Materials:
Printed Instagrams
Mod Podge
Mod Podge Brush
Square Tile (like these from Home Depot)
Directions:
Cover the back of your photos with Mod Podge, and place it on tile.
Once it is dry to the touch, seal the coaster with another coat of Mod Podge
They were super simple to make! I made these coasters as part of the table decor for my husband's surprise party last summer. To celebrate his milestone birthday, I was looking for a creative way to display pictures from different parts of his life, and these did the trick!
If you are not an avid Instagrammer, use this clip art to make your own set of custom coasters!


If you are anything like me, you have a ton of absolutely adorable Instagrams that live somewhere in the clouds. I love me some Instagrams, but their signature square shape make them a bit challenging to put into a standard size picture frame.
I made my husband this set of awesome coasters out of some of our favorite 'grams!
Materials:
Printed Instagrams
Mod Podge
Mod Podge Brush
Square Tile (like these from Home Depot)
Directions:
Cover the back of your photos with Mod Podge, and place it on tile.
Once it is dry to the touch, seal the coaster with another coat of Mod Podge
They were super simple to make! I made these coasters as part of the table decor for my husband's surprise party last summer. To celebrate his milestone birthday, I was looking for a creative way to display pictures from different parts of his life, and these did the trick!
If you are not an avid Instagrammer, use this clip art to make your own set of custom coasters!


Project {Coffee Dirt Dough}
Last week, as a little treat I decided to buy myself a French Press. It took less than 24 hours to become a full blown obsession (iced coffee!!!) Not being one to waste, I started saving the coffee grounds, knowing I could use them for something.
A few days later, Lucas asked for play dough and I knew I had found my "something" With my love of coffee and his love of trucks, we had the perfect combo and Coffee Dirt Dough was born.
1 cup flour
1 cup salt
1 cup wet coffee grounds
1 tablespoon cream of tartar
4 tablespoons oil
Mix in a large pot and stir over medium heat until it pulls away from the sides and a ball forms.
Great to use with trucks, dinosaurs, fake flowers and you can alter the texture by changing the grind of your coffee!
Play {Summer Can Kick the bLuCket List}
Maybe it's because Karen and I are teachers, but we are both absolutely obsessed with summer! I mean, life is just better in flip-flops, isn't it? The days just get a bit lazier . . there are ice cream sundae rides, popsicles, fireworks, and skies filed with twinking stars. Summer means trips to the beach, more time to spend with family and friends, and the ever persistent smell of sunscreen wafting through the air, and we love everything about it through and through.
The ladies of LuCk have decided to put ourselves up to a bit of a challenge by creating a Summer bLuCket List!
Ally & Chuck's bLuCket List
- Discover a new Popsicle Recipe
- Make a mud pie
- Enjoy an outdoor movie
- Stay up past bedtime
- Forget what day of the week it is
- Have a family camp out
- Do a ridiculously messy arty project outside
- Catch a lighting bug
- Explore a new place
- Learn how to blow a bubble
- Stand in a bubble
- Eat smores on a weekly basis
- Swim in a lake
- Go fishing
- Make a Winter Wonderland
- Go for a hike
- Bury someone in sand
- Play mini golf
- Eat homemade ice cream
- Go down a water slide
So, here's to mud pies & water slides! Happy Summer!
Creative Spaces {Lucas Land}
We have this great three seasons porch at our house that has never served a specific purpose. In the summer, it turns into a storage room for the overflow of Lucas's toys. In the winter, we put the Christmas tree out there to keep it away from curious hands and climbing toddlers. I was actually working on unpacking the spare bedroom upstairs when I had a brainstorm/moment of insanity. I have always wanted an art room, aka a space where I could be creative and not have to worry about the mess or being in the way. Now that I have Lucas, it was the perfect excuse to have a creative space in the house.
Here is how we turned our not-so-purposeful room, into an affordable, fun, creative, purposeful creative space!
I found an old, beat up desk on the side of the
road a few months ago and it was a great place to get started. It is
a little big for Lucas now, but it worked well for storing supplies. In time, Lucas will grow into it.
We have most of the art supplies stored in plastic
drawers and a 4 sided art cart. I love that the supplies are all
accessible to Lucas. It was a big risk to take, but he is very good at
asking for help to take out the paint and I love the independence and
responsibility it teaches him.
We are currently using an old toy box by the window as his table. I love that he can lookout and be inspired by the great outdoors (and maybe a truck or two driving by) We were using an old TV stand, but that has been re-purposed as a seed sprouting station. My little guy is becoming quite the gardener this year and the art room is a perfect place to make a mess with dirt and a great sunny spot to grow!
For those less messy days, I have set up a flannel
board corner for Lucas to be creative in. He loves retelling the stories
with me, as well as making up his own. Creating them is a great
creative outlet for me!
We have a child sized easel, but the funny thing is, we have yet to use it now that the art room is set up. Lucas can usually be found at the station by the window or he loves to unroll the kraft paper and get to work on the floor.
I love that the art room is inviting to everyone in the family, even if that means coming home to a naked child, covered in paint from head to toe. Since putting the art room together, I have noticed Lucas is more inspired to create both at home and at school. Hopefully some ideas have inspired you too!
We have a child sized easel, but the funny thing is, we have yet to use it now that the art room is set up. Lucas can usually be found at the station by the window or he loves to unroll the kraft paper and get to work on the floor.
I love that the art room is inviting to everyone in the family, even if that means coming home to a naked child, covered in paint from head to toe. Since putting the art room together, I have noticed Lucas is more inspired to create both at home and at school. Hopefully some ideas have inspired you too!
Project {Gnomesteading}
Once I discovered the idea of Fairy Gardens, I knew that Chuck needed to have one. One of our local greenhouses sells a whole bunch of miniature everything to turn your backyard into an enchanted forest. Although it is absolutely gorgeous, it is also quite fragile. I didn't want Chuck to turn into a tiny destroyer of her fantasy land. So, I decided to take matters into my own hands.
{Houses}
Michael's sells a large variety of small, inexpensive, wooden birdhouses. I choose these two because they resembled "houses" the most. But, you can also have a rocket or pirate ship fairy garden.
Painting these houses was a lot of fun! My friend and I spent a while trying to figure out the most magical color palettes. Once they were painted, I coated them with a good couple of layers of outdoor Mod Podge.
{Dolls}
Much like the houses, all the fairies I kept coming across were way too fragile for toddler hands. I decided to decorate some peg people in Chuck's favorite colors. Painting peg people intimidated me a bit at first, but I have to say it has become one of my favorite "go to" crafts. There are so many great ideas on Pinterest, Etsy, and Instagram to get inspired by!
{Gardens}
When we went to Home Depot to buy our containers, I came across these cedar barrels. They are just the right size for Chuck to be able to lean over and explore. I filled the bottom of the containers with mulch for drainage, and coated the top with potting soil.
For the plants, I searched for miniature everything. I also tried to pick plants that would withstand a toddler tug or two. Lucky for us, my backyard is covered in moss, so I was able to add some "fairy lawns" to the gardens by arranging the moss around the homes. I also added a couple of stones for walk ways.
{Play}
Chuck watched me construct all the different elements of her Fairy Garden, but the first time she walked down to play was great! "Fay-wee Gah-Den!" She loves shoving her Gnomes and Fairies into the homes. Also, despite my initial worries, she has been surprisingly gentle with the plants. She can stay busy playing while I get some yard work done or even relax ( I know, amazing, right?) in the back yard.
I can't wait to see how this evolves over time!
Subscribe to:
Posts (Atom)