Project {Gnomesteading}

Once I discovered the idea of Fairy Gardens, I knew that Chuck needed to have one.  One of our local greenhouses sells a whole bunch of miniature everything to turn your backyard into an enchanted forest.  Although it is absolutely gorgeous, it is also quite fragile.  I didn't want Chuck to turn into a tiny destroyer of her fantasy land. 

So, I decided to take matters into my own hands.

{Houses}
Michael's sells a large variety of small, inexpensive, wooden birdhouses. I choose these two because they resembled "houses" the most.  But, you can also have a rocket or pirate ship fairy garden.

Painting these houses was a lot of fun!  My friend and I spent a while trying to figure out the most magical color palettes.  Once they were painted, I coated them with a good couple of layers of outdoor Mod Podge.
{Dolls}
Much like the houses, all the fairies I kept coming across were way too fragile for toddler hands.  I decided to decorate some peg people in Chuck's favorite colors.  Painting peg people intimidated me a bit at first, but I have to say it has become one of my favorite "go to" crafts.  There are so many great ideas on Pinterest, Etsy, and Instagram to get inspired by! 
{Gardens}
When we went to Home Depot to buy our containers, I came across these cedar barrels.  They are just the right size for Chuck to be able to lean over and explore.  I filled the bottom of the containers with mulch for drainage, and coated the top with potting soil. 

For the plants, I searched for miniature everything.  I also tried to pick plants that would withstand a toddler tug or two.  Lucky for us, my backyard is covered in moss, so I was able to add some "fairy lawns" to the gardens by arranging the moss around the homes.  I also added a couple of stones for walk ways. 
{Play}
Chuck watched me construct all the different elements of her Fairy Garden, but the first time she walked down to play was great! "Fay-wee Gah-Den!" She loves shoving her Gnomes and Fairies into the homes. Also, despite my initial worries, she has been surprisingly gentle with the plants. She can stay busy playing while I get some yard work done or even relax ( I know, amazing, right?) in the back yard.

I can't wait to see how this evolves over time! 


Celebrate {Fairy Garden Housewarming}

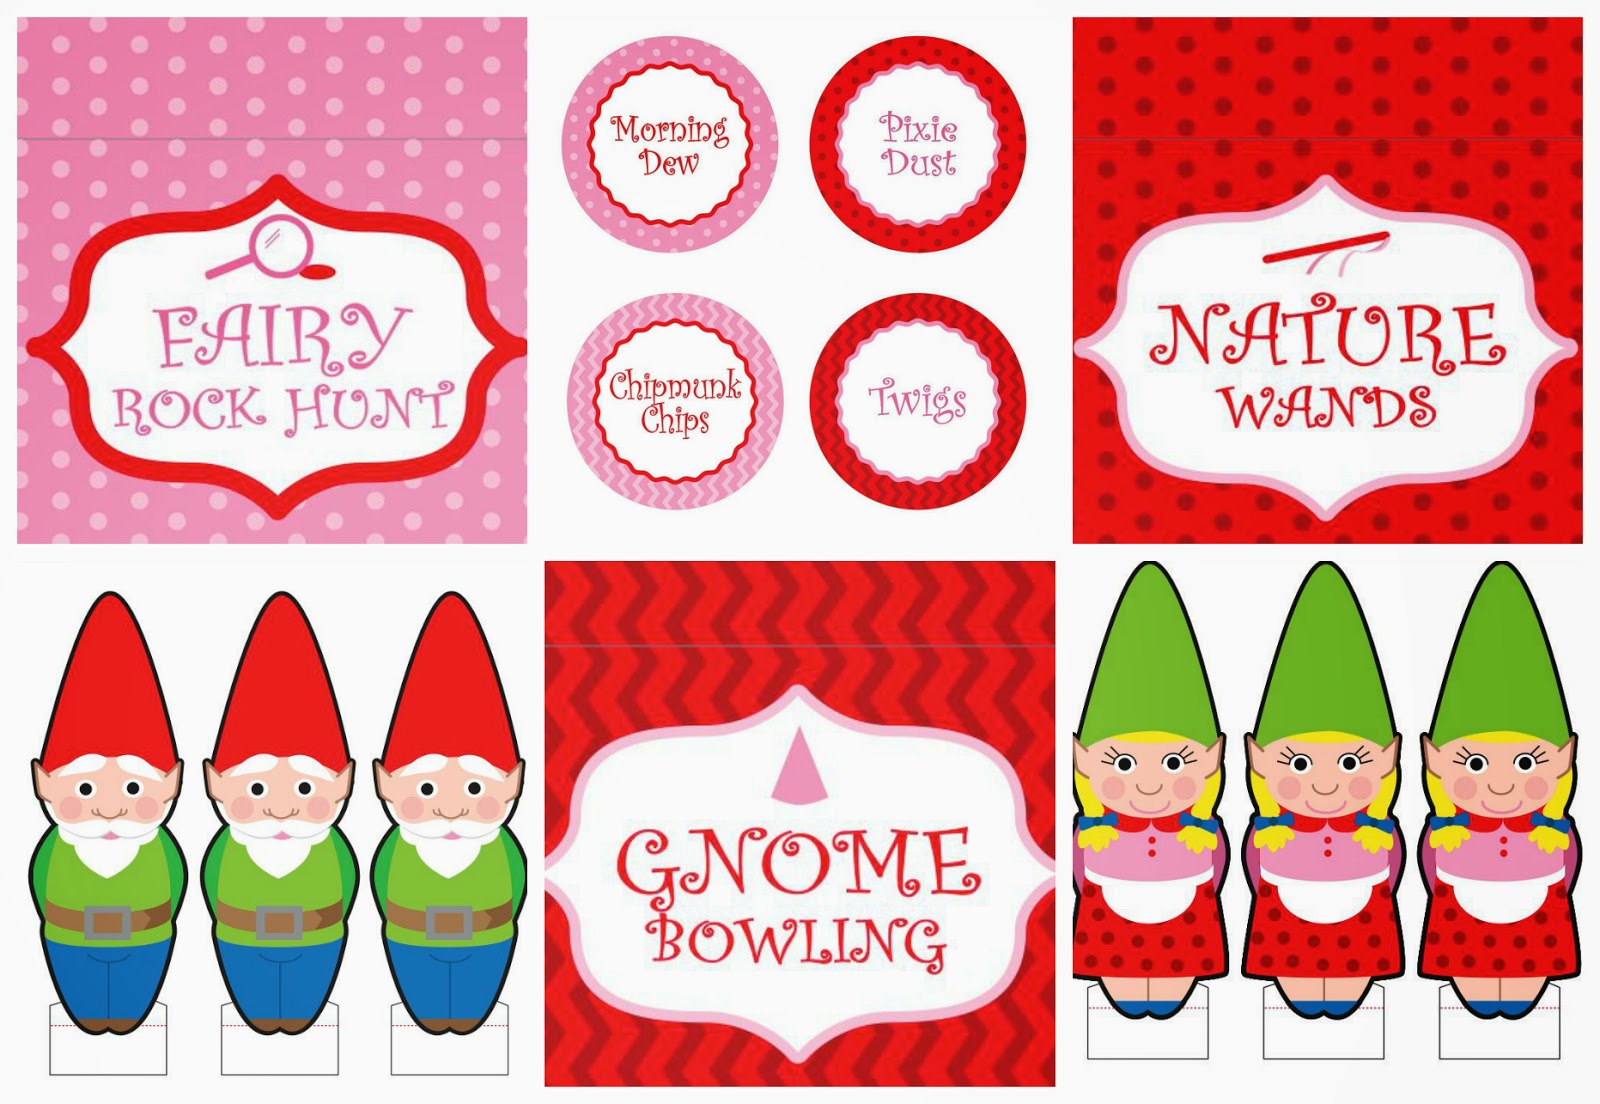
We've been working on our Fairy Garden all Spring, so this weekend we gave the fairies a proper housewarming! We invited a couple friends over to frolic around our back yard, go on a Fairy Rock Hunt, bowl for some Gnomes, and decorate Nature Wands. It was an absolutely enchanting way to spend some time in the sunshine immersed in a magical land of gnomes and fairies. We've included a printable "Party Pack" for you to host your own fairy gathering this summer!

{Decorations}

A little red felt with white polka dots can go a long way! I made the tablecloth for the food table out of a giant piece of red felt with white felt polka dots for a "mushroom" effect. I also used a couple of our tree stumps to make toadstools for the backyard. These were really cute, and very easy to make! I just simply cut a circle of felt and secured it to the stump by tying ribbon around it. I then glued some more white felt polka dots to the red felt.
I used some of Chuck's coffee filter butterflies to decorate the trees! The clothespins can be clipped just about anywhere, and were really useful when trying to hang the garlands from the trees.

{Food}

Our fairies should feel more than welcomed to the neighborhood after the spread we set out for them! Thinking of magical munchies is way too much fun!
To drink, we had "Morning Dew", otherwise known as water with berry ice cubes! Fairies and Gnomes are known to have a massive sweet tooth, so we decided to indulge them with these gorgeous flower and toadstool cupcakes from Delicate Designs. To munch on we had "Chipmunk Chips" (banana chips), "Twigs" (pretzel sticks), and "Pixie Dust" (popcorn).


{Activities } 

Nature Wands 
We collected some sticks from the backyard, and stuck a paper flower on top. Voila! You have a nature wand! I had some baskets with ribbon, flowers, butterflies, and lots and lots of glitter to add some extra sparkle! There is plenty of room for creativity with this activity


Fairy Rock Hunt 

Chuck absolutely loves hunting for rocks. Lucky for her, our backyard is filled with them!
I took a couple from her collection and added a little fairy dust (aka, silver paint and glitter ). Each rock was monogrammed with our guests initial (we know how much Lucas loves "L is for Lucas") While the kids were decorating their nature wands, I placed the rocks in the backyard.
For how easy this activity was to pull off, the kids had a great time hunting for their Fairy Rocks!


Gnome Bowling 

I found an inexpensive bowling set at Party City ( I saw a similar one at Michael's and Toys 'R Us), but I am pretty sure 10 water bottles would work just as well! Use our Gnome Clipart to create your own set of Gnome Bowling Pins!


I truly enjoy planning these little celebrations for my daughter and her friends. There are times, however, when I feel like I may have gone over the metaphorical edge (hypothetically speaking, say when its 11:30 on a Friday night, and you're standing in the kitchen cursing out the glue gun because you can't get it to turn on after trying it out in several outlets in various rooms throughout your house.) With that said, the look on Chuck's face when my husband brought her down to the backyard was absolutely priceless. Watching her little friends parade around the backyard with their nature wands firm in hand was pure magic. I am pretty sure, that the best part of the party was when all five guests experienced the joy of rolling down the hill to my backyard. That was 100% pure childhood magic at its best!


{Printables}
Click below to download a PDF with all our clip art from the party.
https://docs.google.com/viewer?a=v&pid=sites&srcid=ZGVmYXVsdGRvbWFpbnxsdWNrZ3VpZGVzfGd4Ojc0NzE3OWUzZDBhMmJkNmI


Vendor Credits
Cupcakes: Delicate Designs
Chuck's Pixie Tutu: Alexander & Sophia
Chuck's Wings: Fairy Flower Dreams
Lucas's Essential Cardigan: Alexander & Sophia


LuCk on the Run {Jamie Oliver's Food Revolution Day}

When I heard Jamie Oliver's Food Revolution Day was coming to New Canaan, I knew i wanted to be a part of it. Jamie's mission is to help kids gain food knowledge to make better food choices for life. Since Lucas was a baby, it was my mission to expose him to as many new foods as possible as well as have him be an active participant in the kitchen for the same reason. In turn, I like to think I have created a little "Foodie Jr." He will try almost anything that is not watermelon or a Brussels sprout and not once have I had to make a "kid friendly" meal for him. Most of the time I can't even finish my breakfast of spinach and eggs because he climbs on my lap and eats it all. And eel? forget about it, the kid loves it. Of course, on Food Revolution day he was not as adventurous as i had hoped but we all had a great time anyways.

Cheers to Hamlet Hub for running such a well organized event that was fun for the whole family!


Here are some of the highlights we can't wait to return to, with or without the little guy.

Fjord Fisheries
22 East Ave
New Canaan, CT
Every piece of fish in the Fjord fish market is hand selected, bought whole and cut by hand. As soon as you walk in, you can tell this is a quality fish market. For the kids they had smoked herring dip to sample, it was out of this world! They also had California rolls that were also very tasty. Their sushi is made fresh in the store, right in front of you. Lucas loved watching the lobsters in the tank. If you are looking for a high quality fish market, this is your place!

Goldenberry
149 Cherry St
New Canaan, CT
Goldenberry is a specialty store with all of your UK favorites. It was well worth the walk from downtown to get there! They were sampling banger sausages and fish sticks. Both were tasty and available for purchase inside the store. The highlight for Lucas was the samples of the Cadbury Buttons. I was excited to find Cadbury easter candy 50% off!

New Canaan Olive Oil
98 Elm St
New Canaan, CT
New Canaan Olive Oil had a table set up at the Pop Up Park, but I cannot wait to go visit the store! Mocha Almond Balsamic Vinegar sounded strange, but was amazing. As was their lime infused olive oil. Wave Hill Breads Bakery was set up right at the next table and the pairing was perfect!

Rosie
27 Elm St
New Canaan, CT
Rosie's is definitely on our "revisit soon" list. Their guacamole was so good I can't wait to try the rest of their menu. Judging by the patrons plates, breakfast/brunch is the time to go.

Station Eats
19 South Ave
New Canaan, CT
I have been wanting to visit here for awhile and finally got to go! They were sampling their veggie burgers which I was excited about. Veggie burgers are always something I want to try, but have a hard time turning down a real burger so they always seem to get passed by. This veggie burger was amazing. You can tell it was made with fresh, quality ingredients and it really made a difference.


Peachwave
11 Forrest St
New Canaan, CT
Although we have one right down the street from our house, and they were not serving Lucas's beloved chocolate during the Food Revolution this may have been our favorite stop. After choosing to sample the plain tart yogurt and gobbling it down we accidentally stumbled on a pleasant surprise in the back. We were on our way out the back door when we found a second room, filled with bean bag chairs! If jumping on bean bag chairs wasn't fun enough, there was a television playing Frozen. Peachwave New Canaan may be our new rainy day/hot day hangout.


After a fun morning of walking around and sampling new and exciting food, Lucas was pretty happy to be rewarded with his "Certificate of Bravery" and his very own wooden spoon. Although he was not brave at every spot, it was fun to watch the other children try new things. I can't wait until next year when he is a little bit older and a little bit braver. Until then I will try my best at home.


Recipe {Peanut Butter Balls}

If anyone asked what my most used item is in the kitchen it would have to be peanut butter. Not the stove, not the refrigerator, yes peanut butter. Lucas and I go through a 26 oz jar in a normal week, just the two of us. It's a little out of control, but that's okay!

Around Valentine's Day, I found myself with a few packets of dry milk and not a clue what to do with them. I had bought them to make edible chocolate play dough that turned out to be an epic fail. I was on a mission to use up the dry milk and I knew my first love, peanut butter was the way to go.

After a few delicious experiments, Peanut Butter Balls were born. Without a doubt, these are by far my greatest culinary masterpiece to date and I am sure they will not be loosing the title any time soon.


So without further adieu, the recipe for Peanut Butter Balls

You will need:
A food processor
measuring cups
a spatula
a tablespoon


Ingredients:
1 cup Peanut Butter (we use Smucker's all natural)
1 cup oats
1 cup Cheerios
1 packet dry milk
1/2-3/4 cup honey

Put all of the ingredients in the food processor and blend until it comes together. You may need to scrape the sides a few times. Use the tablespoon to form balls and store in an airtight container in the fridge. 

They are good on their own but also taste amazing dipped in chocolate! 

Project {Coffee Filter Butterflies}

According to the Farmer's Almanac, May 15th is the final frost date around here.  This can only mean one thing: the Gnomes and Fairies are ready to make their arrival in our gardens for the summer!  Little Miss C has been very curious about when the Fairies are going to move in. We go down to the garden everyday and see if any have come to live in the little homes. So far, we have just attracted a small Lookout Gnome.  A few weeks ago,  she looked at me and said, "mama, we have paw-tee, and fay-wees come."  What can I say, she's my kid.

And, yes, I am that crazy mother that decided to have a "Fairy Garden Housewarming Party!" 

The Gnome Workshop has been in full swing lately; over the next couple of weeks I'll give you all the details on how to create a simple (and affordable) Fairy Garden for even the smallest of spaces.  This weekend, we started making some decorations for the party.  Chuck has been full blown obsessed with all things winged lately, so I thought we'd try her little hands out at coffee filter butterflies. 

We set up a table on the porch  with water color paint, brushes, and dot-a-dot painters, gave the girls some coffee filters, and watched the magic happen. 
Chuck and her little friend spent the better part of an hour watching the colors whirl about on the coffee filter.  Watching them experiment with different color combinations was quite fun.  They quickly figured out that a dot-a-dot painter and a wet coffee filter create beautiful swirls of color.  We hung our Technicolor creations up to dry for a bit. 

When the filters were dry to the touch, we folded them accordian style, and clipped the middle with a clothespin to create a "bew-ti-ful" butterfly. 

With a little luck, these winged creations will attract a fairy (or two!)


Celebrate {Mother's Day}

Each year, I send my mother flowers for Mother’s Day.  Yes, flowers are beautiful. Yes, I know she appreciates them.  Yes, I know she knows I love her. Yes, we’re lucky if the flowers last for a week.  So, when our lovely neighbor, Michele, told me that she wanted to throw a Spring Garden Party, and let the kids plant their own flower boxes and herbs, I got super excited!  I love the idea of giving potted plants as gifts because its something that is sustainable and can be enjoyed longer than a week.

Michele loves to garden!  Almost every day, Chuck and I can walk by her house and find Michele sitting outside digging up and rearranging her garden.  Her three-year-old daughter is usually by her side, happily digging along with her (sometimes romping around with Chuck and Lucas.) Over the last couple of years, Michele has become my go-to-guru of all things that bloom.  She’ll walk around my perennial gardens and tell me what everything is, what needs to be divided up, what can be moved, and when to move it.   Michele is happiest when there is dirt under at least one of her fingernails.  

When we arrived at Michele’s house, she had a children’s table set up with recycled clementine crates and metal tins filled with a variety of flats of flowers and herbs.  Hidden under a table, she had buckets filled with dirt and kids garden tools.
I know Michele loves  “The Secret Language of Flowers”, so I designed some labels for the herb pots with the meaning of each of the herbs.  These would be a great (and easy) Mother’s Day gifts!  These labels are designed to be cut out, decorated, and glued onto a craft stick.  This year, when I give my mom a pot of  “Cilantro for love”, I know she’ll be able to use this in her kitchen throughout the summer.  


Herb Garden Plant Markers 
Click to Print


Recipe {Sprouted Chickpeas}

We always like trying and experimenting with new foods! We are big chickpea fans (is there anything that doesn't taste good dipped in hummus?) Naturally, sprouted chickpeas have been on my list for a while -- we decided that this was the week to give them a try! The whole process takes a couple of days to complete, but we had fun observing our chickpeas plump and sprout!


First you need to soak the dried chickpeas overnight. We put them in a large mason jar and by the next day they had tripled in size. 

While in the mason jar, give them a good rinse.  Wrap a piece of cheesecloth over the top of the mason and store upside down in a bowl.

Over the next two to three days,  rinse them a couple of times times a day until your chick peas have 1/8 to 1/4 inch sprouts. 

After your chickpeas have sprouted give them one last rinse, have them dry a bit on a towel

Place the dried sprouts on a cookie sheet and place in an oven at 375°. We baked ours for around 45 minutes.

 While the chick peas are still hot, toss them in a bowl with desired flavorings. We decided to flavor ours with some olive oil, honey, cinnamon, and just a pinch of sea salt. This coating gave the chickpeas a nice little sweet crunch.